Ask anybody who was born and spent a good chunk of his/her life during Soviet Union what the most popular cake of the era was, chances are you will hear Napoleon. It is true. It was super popular back then. It still is; after many years after the collapse of the USSR, the cake reigns supreme and graces every pastry shop in many parts of now independent countries, including Azerbaijani capital, Baku. A luscious cake made of crisp thin layers, each slathered with delectable pastry cream, cake Napoleon is a Russian rendition of the classic French, but tweaked and changed greatly, although the name remained the same.
There are numerous recipes on how to make this famous cake. The layers can be made from either laminated dough or simple, like in the recipe below. The dough is rolled into very thin layers – the thinner the better, although some do with fewer and thicker layers, to save time and energy.
I have to admit – this was the first time I made a Napoleon. I was quite happy with the results, but I think next time I will experiment with another pastry cream recipe for change. This cream was good but a hopeless perfectionist in me is saying that there might be a better one out there and that I should look for it until I find it. Enjoy!
CAKE NAPOLEON
For the Dough:
7 oz (200 g) cold unsalted butter, cut into chunks
4 cup all-purpose flour
1 egg
1 cup sour cream
For the Cream:
3 eggs
1 1/2 cup sugar
6 tablespoons flour or cornstarch
4 cups milk
7 oz (200 g) unsalted butter
Note: The cream can be prepared a day in advance and stored in the refrigerator until needed.
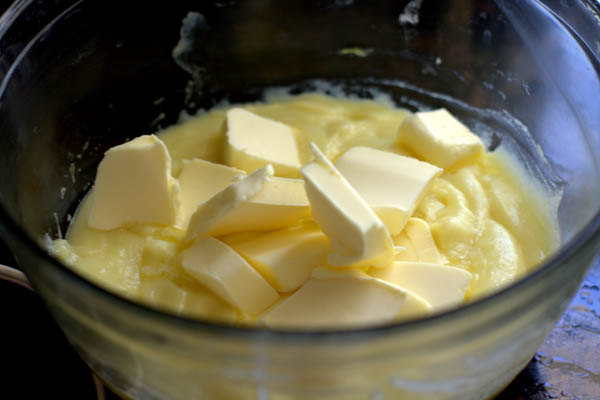
First, prepare the cream. In a medium mixing bowl, beat the eggs with sugar, until pale. Pour the mixture into a medium saucepan. Add the milk and flour. Stir vigorously with a balloon whisk to break the lumps. Turn the heat to medium to high. Cook the mixture, stirring constantly until the mixture thickens, 6-7 minutes. Remove from the heat. Let cool about 10 minutes. Add the butter and beat with a mixer until the ingredients are well blended and the mixture is smooth and creamy. Cover the cream with a plastic wrap and chill in the refrigerator.

Meanwhile, prepare the dough. Put the flour in a large mixing bowl. Add the butter and, using either a fork, or a knife (or pastry blender, if available), or your fingers, cut in the butter until you obtain large pea-size crumbs.

In a separate bowl combine the egg and sour cream and stir to mix. Make a well in the center of the flour-butter mixture. Pour the egg-sour cream mixture into the hole. Toss with your hand until the dough comes together in a mass. It should be gentle to touch. If the dough is still sticky, add a little more flour.

Divide the dough into 7 equal parts (you can divide into more if you think you can roll them into super thin layers later. 7 layers works fine for me), forming each one into a disk. Wrap each disk in a plastic wrap and chill in the refrigerator for 2 hours.

Once the dough has chilled, you can bake the layers. Remove the dough from the refrigerator.
Preheat the dough to 400F (200C).
Work with on dough ball at a time and keep the others covered. Using a rolling pin roll one ball into a very thin 11-inch square (you can roll into a rectangular too, depending on the size and shape of your baking sheet). Carefully transfer the square onto an ungreased baking sheet. If needed, stretch to fit it properly and close any tears by pressing onto the dough. Pierce the dough randomly in 3-4 places. This will prevent the blisters from forming, although they will still form but in smaller numbers (Do not worry. We will take care of them when you assemble the cake).

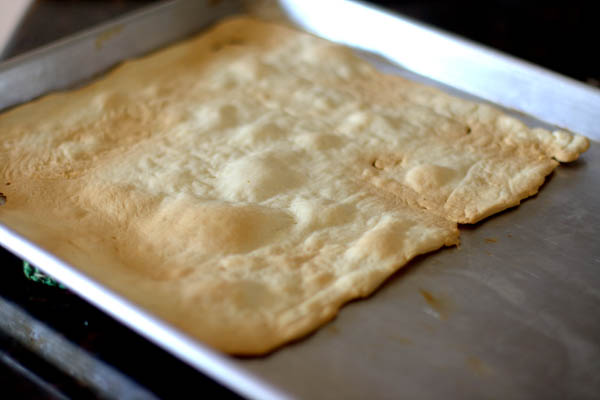
Bake each layer on the middle rack of the oven until light golden, 6-8 minutes. Watch closely not to overbake. A baked layer will look like patches of white and light brown, and this is exactly what you want to achieve. Carefully lift the baked layer off the pan. Take care not to break – the layers are extra fragile. Do not worry if you slightly overbake or accidentally break one layer – you will need one layer for the crumbs anyway, so the not-so-perfect layer can do that job. Continue with the remaining dough balls, stacking the layers on top of each other as they bake.

Once you have finished baking all the layers, you can assemble the cake. Pick one layer that is not perfect – damaged or slightly overbaked – and grate it to obtain fine crumbles. Reserve. Now, place one layer onto a tray, wide enough to fit the cake. If there are blisters, poke them gently with a fork to break. Do not worry if the layers crack as you assemble them. Spread a generous amount of cream on it ( Be extra generous with cream around the edges of each layer as they are the hardest to absorb the creamand soften). Put another layer on top and spread some cream all over.

Continue in this manner until you have used all the layers. Sprinkle the top of the cake generously with the crumbs. If the sides of your cake are not perfect, do not coat them with crumbs now – reserve some to do it when the cake is moist and you can trim the edges with a knife. If you were able to get perfect edges, press the crumbs on the sides of the cake now. Or, just leave them as is, without crumbs.

Your assembled cake will look like a rock-hard inedible mess now. Do not panic, as the cake is not ready to eat at this stage yet. Allow it to rest at room temperature for at least 7-8 hours, or best, overnight. The layers will absorb the cream and the cake will be soft. The next day cut the cake into pieces and enjoy!


